YANNI HE
CG Generalist/ VFX

Congrats!
-- We won the IDA Awards :)
SCAD X HARBOR PICTURE BLOG

Our TEAM


Yanni He
FX Artist
Dee Divakaran
Art Director/ CG Generalist

Sai Shashank
Matchmove/Compositor

WEEK 01
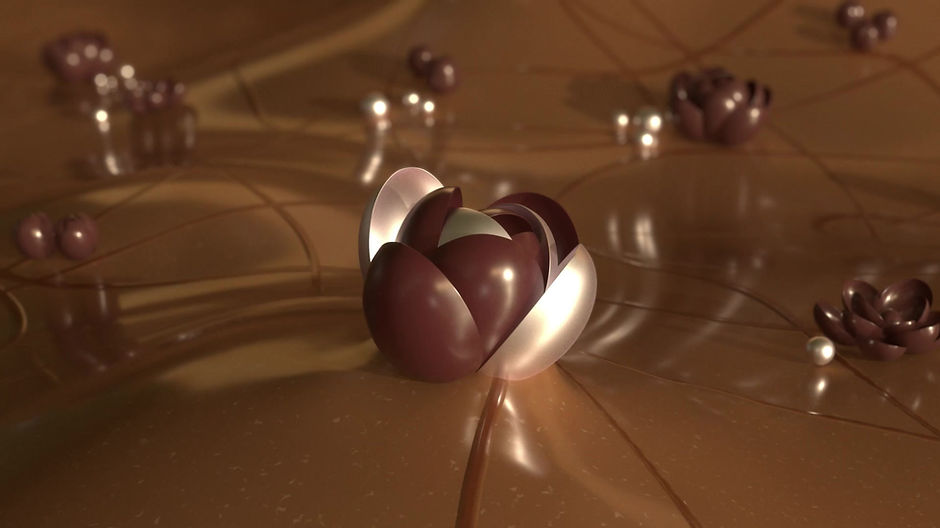
VOSGES
CHOCOLATE
In the first week, My teammate(Dee, Shanshank) and I conducted brainstorming sessions and some conceptual design discussions. Eventually, we settled on the theme for the Easter chocolate. Easter Blossom Bunnies, Vosges limited-edition chocolate celebrates Easter and the freshness of spring.


FX List:
1 - Growth & Particle Rotation
2 - Fluid Collision
We decided to create two types of visual effects.
The first one involves producing particle rotations around the chocolate box, with the particles replaced by chocolate fragments. This effect is synchronized with the growth of the chocolate box. The second effect simulates the collision between chocolate fluid and fragments.
Reference for FX shot1 - RBD growth & Particle
Reference for FX shot2 - Chocolate fluid collision
FX Tests
1 - RBD set up
2 - SOP Collision test

SHOT1 - WIP

Fracture Set up

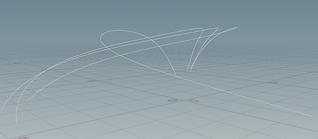
Movement Curve


Output curveU attribute in resample node, then using the curveu attribute to change the movement lines.


Animated Points
Calculate the "dist" attribute between points. Utilize the point's own "P" attribute and the "dist" attribute to create a spread effect. Use Ray to calculate the minimum distance between points and the ground.
SHOT2 - WIP


In the initial stages, I opted not to directly simulate fluid dynamics. Instead, I created a simplified version using VEX wrangle in SOP as this approach is more suitable for the previsualization stage.

Week 02
Started working on revising FX tests, 3D previs, and tests for live shooting.
01
Refining FX tests - shot 01
For the first shot, this week I primarily adjusted the motion curves of RBD fragments to make their movement more randomly natural. In addition, I added a new layer of rotating chocolate particle effects.

Using For Loop to randomly adjust some curves to make certain curves move more randomly and not uniformly.


Add noises on the main curve and squeeze the movement curve of them


Using the camera position to adjust the p scale attribute of particles, thereby controlling the harmony of the composition.

For the scecond layer particles, I set one spiral line as the motion paths for the particle base and utilized the starting points of the lines as particle emission sources. Subsequently, I randomized the pscale and orient properties of the moving particles, and copied chocolate chips to points.


02
Refining FX tests - shot 02
I'm starting the second shot - R&D for nuts falling onto the chocolate fluid. In the first week, I experimented with SOP, and I felt that using SOP for a large number of objects interacting with fluids lacked some details. So, this week, I'm starting to use Flip for the R&D shot.
According to the reference, some nuts will sink directly, while others will float on the fluid - this means I need to do two or three layers of work to ensure randomness in the interaction after the nuts fall.

First, I created a flowing motion plane using oceanspectrum and input it into the static solver of the DOP system. I set the friction to 0, allowing objects to fall and move with the flow of the plane.

Then I imported it into the Flip Collide node as a collision object. The fluid motion generated by the ocean spectrum is also imported into the simulation. Due to the higher density of chocolate, I conducted viscosity tests with values of 5 and 10, respectively, because I want to create noticeable collision indentations on the surface when the nuts fall.


I believe the next step is to improve the liquid simulation, perhaps by adding another layer of interaction effects using SOP for the nuts falling on the surface. Currently, all objects are falling too quickly, and I want to add a layer of slower nuts with a higher substeps value.

This is a straightforward fluid simulation - the emission source is above the chocolate, and emission stops at frame 55.


Quick procedural shading test for nuts

03
3D Previs
This week, we begin creating 3D previs and designing transitions between shots and following the advice of mentors, we are still revising and contemplating the third shot.
04
Live shoot test
Our compositor also tested live shooting, 3D Equalizer-exported tracking, and ensuring that the camera works correctly in Houdini.
This week we decided to add a particle trailing effect to the first shot and cut out the interaction between the chocolate chips falling and the liquid in the second shot. Revise the composition and reimagine the connection and style between individual shots.
01
Shot 1 - Customized Particle Trailing Tool


The trail subnet allow users to customize trail based on different curves. Using orientalongcurve to calculate correct Up and N, then imported into pop network as curve force.


Shot 1 - Particle Effect


The first step it to create lines, materialize the lines and configure thickness changes, and use the pathdeform node to adsorb the object to the curve. Trail node is used for calculating velocity.
Animate the pathdeform, and adjust popdrag & popforce to optimize the movement of particles. The R&D of particles will be main stuff for next week.
02
Shot 2 - Optimize & Vellum Set Up
For the shot2 - I changed the composition according to mentor's feedback, and took off the interaction of dropping nuts and chocolate fluid. Simplify the elements in this scene. We decided to move the bunny into our second shot, and made one dripping effect on the bunny. The dripping effect's R&D has been done in week 02.

Leaves - Vellum

I created four different shape leaves, then using copy to points & variant attribute to scatter them on grid. This is the source of vellum.


Leaves always influenced by wind stronger when they are higher. When they fall to a lower position, the wind effects are weaker. But since we wanted to make some sort of dreamy style gold leaf, I slowed down the falling of the leaf. Rather than looking like real-world leaves, we wanted them to look like something like gold foil or glitter. They move more slowly, less affected by gravity.


03
New 3D previs for shot1 & 2
Iterations of 3D previs
Since we are mainly busy with live shooting this week, I temporarily stopped the development of the hero shot and will re-organize how to modify it to make the assembly of the gift box lighter and more elegant.
I continued working on shot1 and shot2.
The transition of shot2 to shot3 has not changed, and we plan to connect shot1 and shot2 with camera movement. The camera will follow the particles, and transit to the second shot.
Connection, Style & Optimization
Last week, the mentors made the following suggestions regarding FX:
- Consider the scale of assembly box and fragments.
- Composition of shots.
- Think about a connection between each shot.
- The movement of chocolate fluid can be slower.
Overall, I summarize them with three words, connection, style and optimization.
For connection, we found a reference of magic particles, and would like to create particles like it as it have a elegant, fantastic style.
For style, I decide to take off the dropping nuts, modifying the fluid, and optimize the movements of golden leaves, to make sure every elements in the scene are right for our video styles.
Week 4
Mentors' Suggestions on FX:
- Modify the curve and make the particles' movement smooth
- Slow down the particle's movement
- Leaves falling earlier
Shot 1
Shot 2
Other
Start developing the look
To-do lists:
- Refine curves and particle's movement
- Find more references about magical particle
- Modify Vellum simulation for golden leaves
- Start refining partcle's look
Shot 1
References for magical partcles
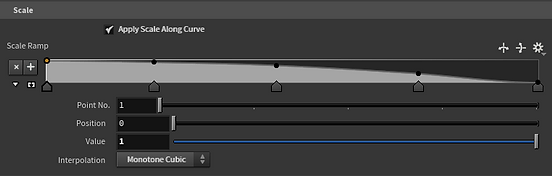
Refine curves and particles' movement
I smoothed the curve of particle moving, and slowed the particles movement. For the particle's shape, I tried to add noise on the pop force, and reduce the life attribute value to 1 - to make particle disappear faster.


WIP - Emit Trail Path


I changed the shape of particle emit source by modifying the ramp curve of scale in Sweep node. Pathdeform connected with the shape and orient along curve node can calculate up and N attribute and make sure the direction of movement is corrent along the curve.
Refine trails
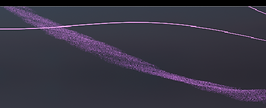

I changed the shape of trails lines to make them thinner and smoother by modifying the pscale and resample length.


Shot 2
Adjust the timing on leaves

Set the simulation starting time earlier so the leaves come into view when shot 02 is revealed.
Optimization on the choclate fluid
As we decided to cancel the interaction of dropping nuts and choclate fluid, I started to do the optimization on the lake. I tried using only ocean spectrum and ocean evaluate to create the lake rather than previous flip solver way, which is better for environment build-up and save time.


Previs Iteration of shot1 & shot2
Worked together to modify the time, camera and did simple set dressing on the environment, imported shader and textures from look dev artist.(with Dee)
Shot 3
Refine FX & Timing modification & Compositing test
FX:
- refining growth speed
- modified fragments scale and fracture structure
- texturing test(with Dee)
- lighting test
- camera & rendering test(with Shashank)
Plan
Shot 1 & shot 2 - develop particles' look and render test
Shot 3 - refining FX test
WEEK 5
Mentors feeback:
- rendering test on motion blur of particles
- developing the look of particles
- add secondary magical trial into shot 3
To-do list:
- modify the curves according to upadted camera
- modify the curves movement(using pryo to drive the particles)
- develop the look of particles
- render test with motion blur
- add magic trial into shot3
Shot1&Shot2
Modify curves according to updated camera
Re-design the curve of particles movement according to updated camera, started developing the look of partcles, did render tests with motion blur.
test01
test02


Using attribute blur to modify the P attribute of particles.


Particles' color set up:
- pop color node/using age attribute to control the color
- using attribute VOP to modify the emssion strength
- set the pscale attribute
- attribute wrangle to control the opcaity of particles.


Glow test
Modified the look dev of particles and magical trails.
Updated version on the magical particles
Shot3
Add trails
- add trails(not the final version, still in work)
- render shadow pass and delivered to compositer to test

- modified the trails
- updated textures and shader
- render shadow pass to compositer
Add particles and details
- Using pop module to generate magical particles around the motion of geometrygrowth


Scatter points:20000

Add noise on the points, calculate distance attribute and exported as Cd attribute
Using XYZdist and primUV function to calculate the curve U attribute


Week6
Mentors' suggestions on FX:
- Motion blur test
- Lets differentiate between the streaming effects so that it is clear which one we should be following
To-do list:
- Refine particles curve according to updated camera
- Develop the look and move of particles & trail to make them different visually
- Motion blur render test(Modify velocity attribute)
- Refine particles effects and render test on shot 03
- Updated render based on new version shader and lighting


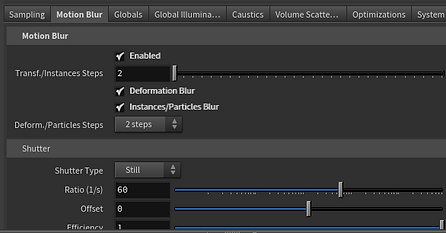
- Motion blur render test(Modify velocity attribute)
SOP level render setting
Motion blur render
Mutiple V attribute 2 times
- Updated new camera
- Fixed issues with jerky movement
- Updated new curves of particles
- Modifies curve
- Making differentiate between the streaming effects
- Add particles and color details on the secondary trail
- Adding pyro to drive the particles'movement
Comparison
Shot3
Refining FX
- Change secondary trails' color
- Optimize the swirl magical particles
- Adding Pyro to drive the particles
- Adding Embers particles
Comparison
New Back-up Camera
- this camera version is for back-up plan
Week7
- Camera Adjustment
- Update curve of particles
- Modify the look of particles
- Add Transition of magical particles
- Add another an another layer of magical particles
- Re-render all things according to updated reverse camera
Shot1&2
Camera Adjustment
Set a new camera based on mentor's suggestion - reduce the times of camera rotation, have a "push in" camera at the end.
Magical Particles
Modified the curve of how particles move, adjusted the color of particles, adding details on the turbulance force
Transition
Added magical particles as transition between shot 2 & shot3
Solving Color Space Issue
Helped our generalist to solve the ACES color space issue and make sure the config version are same, did a quick procedual shader test to check the problem with color.
Shot3
Updated New Camera
Imported new camera from the compositor and re-render all different layers of FX
Modified the Secondary Trail
Added Magical Particles
Based on Professor's suggestions and mentor's feedback we decided to add one layer of magical particles which are the same as shot1&shot2, used it as a connection between different shots.
Week 8
To-do lists
1. Modify Particle's color in shot1 & 2
2. Refine the secondary golden streams
3. Render a higher resolution
4. Refine particle's shape in shot1 & 2
Shot 1 & 2:
- Modify the emission and color of particles
- Refine the secondary golden streams, re-designed the movement curve
- Re-simulate the particles and increas the amount of particles
- Increase the strength of motion blur on golden leaves
- Render with higher resolution
Shot3
Shot 1 & 2:
- Modify the emission and color of particles
- Adjust the color and amounts of embers particles
- Render with higher resolution
